Installation Guide (Full Integration = LinkMode)
Notes
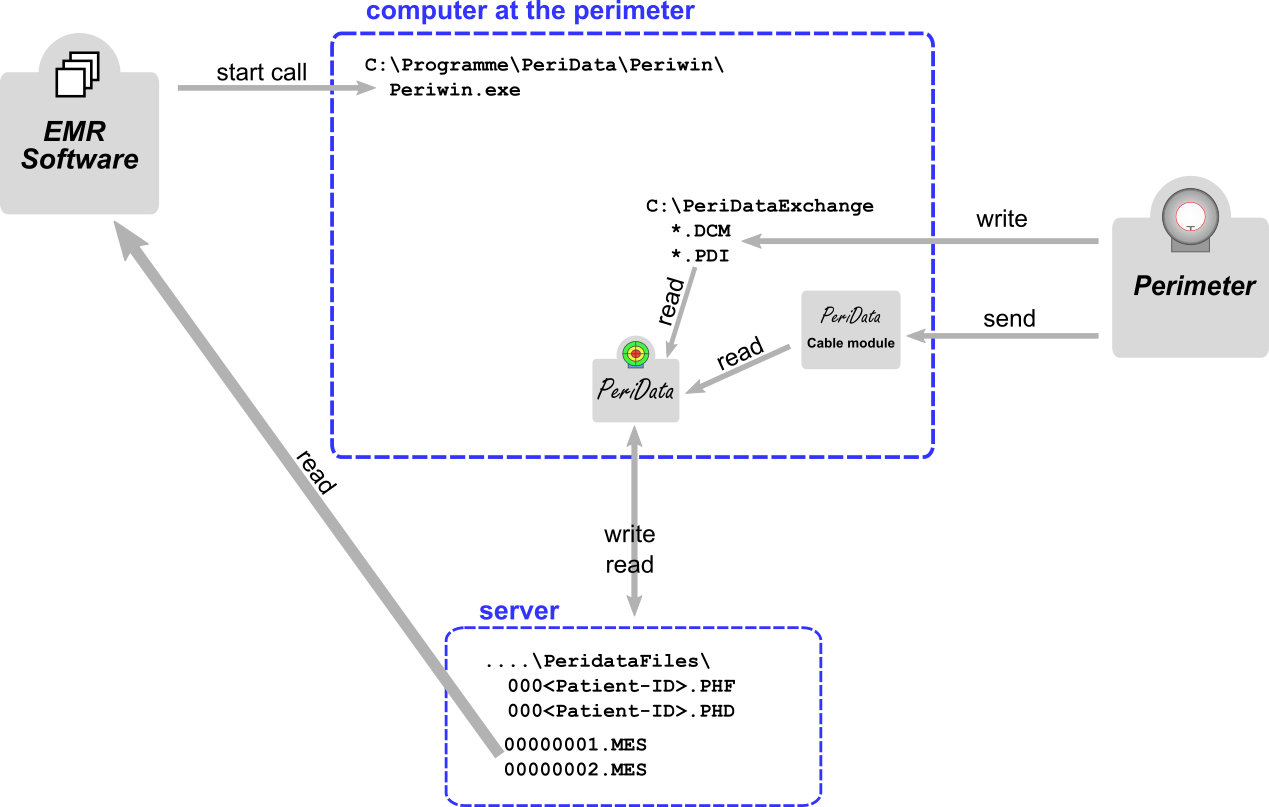
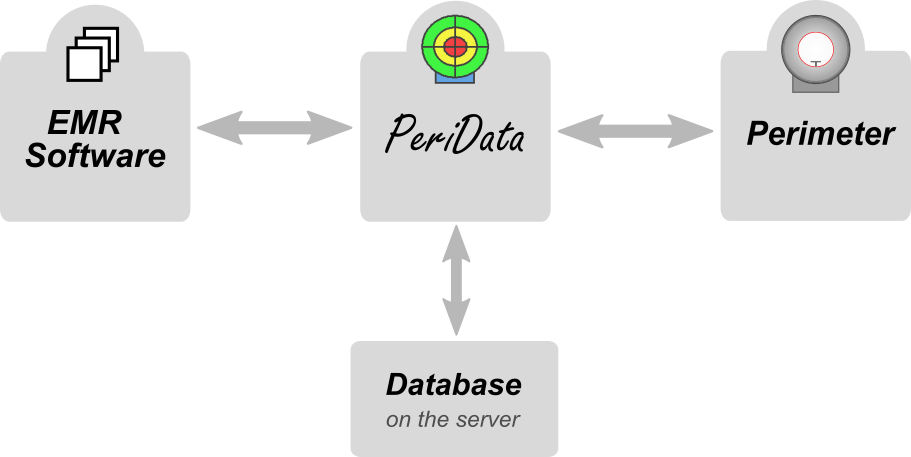
This installation guide applies to IT SPECIALISTS and describes the installation of ALL elements (program, perimeter connection, software link) in case of a FULL INTEGRATION with an EMR software.
INSTALLATION TYPE: There are 4 different types of installation of PeriData in the network. Informations about all 4 installation types
FIRST INSTALLATION: This is a guide for the FIRST installation. For an UPDATE see here >> Informations about Update and Rollout
1. Create the database directory
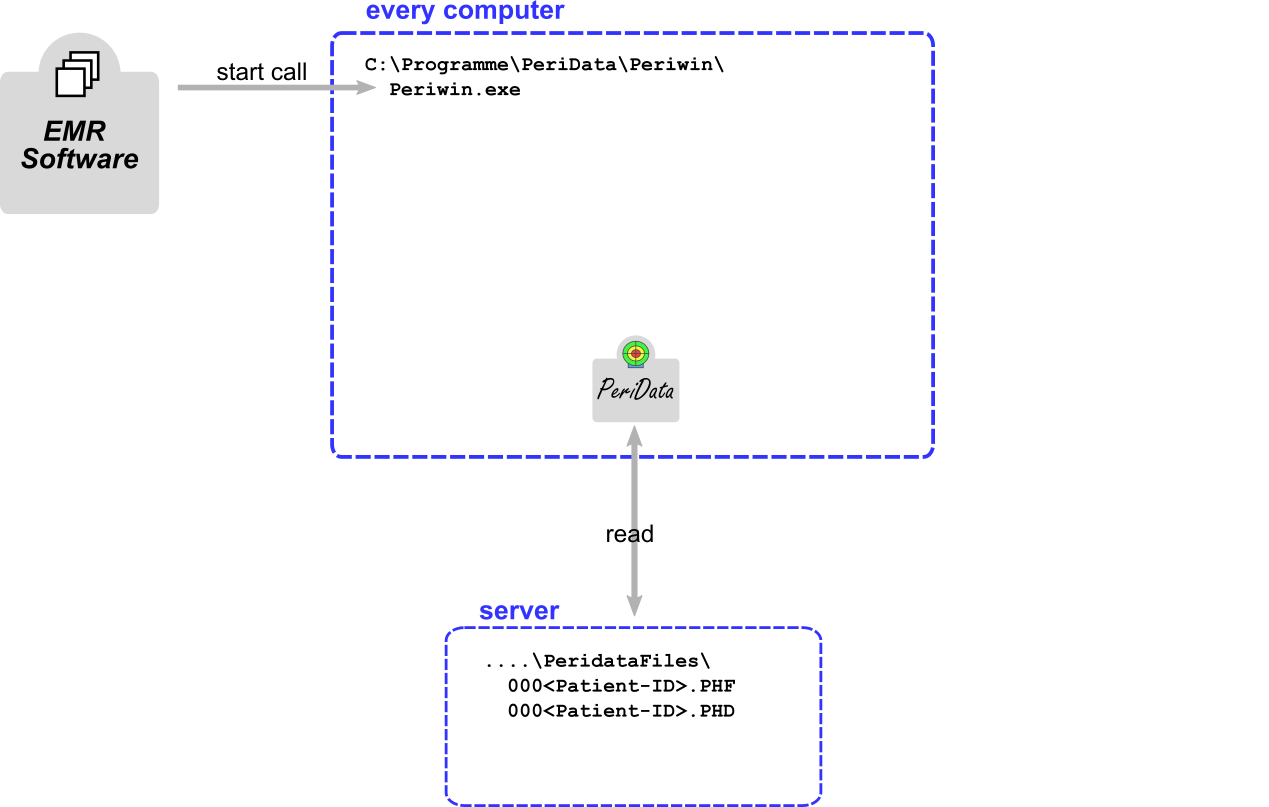
- create a directory on the data server - used for storage of the database files (*.PHF) - in the LinkMode every patient has an own file (additional *.PHD files are temporary)
- recommended name: \PeridataFiles
if this is a server replacement, take the old path to preserve the EMR software link - Directory properties > Security > "Everybody" = full access
- share the folder, note the UNC path
- Link: detailed database specification
2. Install the program
- download the newest version of the setup file from www.peridata.com
- install PeriData on every workstation into the suggested program folder
if there is already an EMR software link, use the path, that the EMR software is using on all other workstations (without \periwin) - TEST: start PeriData > open with DEMO button (license key registration can be done later) - does PeriData start?
- TEST: open a new database (is empty) > save into the database directory - is the directory available?
- Link: detailed program specification
3. Connect the Perimeter and PeriData (only at the perimeter workstation)
- open info: Perimeter > Connection
- Click on the instrument type >> the special help page opens
- perform all 3 steps
- TEST: send examination data form the perimeter > PeriData: open a new database > data received?
- If the perimeter PC is a terminal in a Terminal Server Architecture, the configuration gets more complicated. Read this carefully: Terminal Server
4. Connect the EMR software (with LINK MODE integration)
- open info: general information about the LINK MODE - special configuration depending on the software
- TEST: Press the PeriData button in the EMR sofware - does PeriData open in the Link Mode, opening a patient database?
- TEST: (only at the perimeter workstation) press the active "Perimeter interface button" (red) > Simulation > Examination appears in the database window - does the EMR software process the message to a line in the patient record?
5. Setup the backup routine
- The daily backup should include the database directory (.../PeridataFiles) with the database files *.PHF and *.PHD